1. Let's start out by creating a new file. We will be creating a 3D text effect with special smoke. I used a 800x300 pixels canvas set at 72dpi, and I filled my background with a black color. Then make a new layer set and name it 'text design'.
2. Now select the horizontal type tool then set the font family to arial black, regular, 80 pt, smooth and white color. In a new text layer type your name.

3. Under layer style (layer - layer style) add a drop shadow, inner shadow, inner glow and gradient overlay blending options to your name text layer.
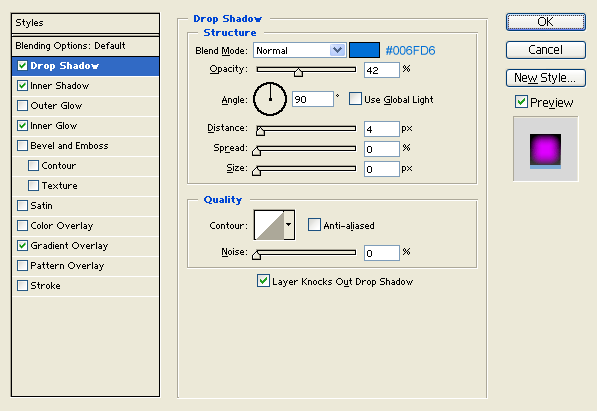
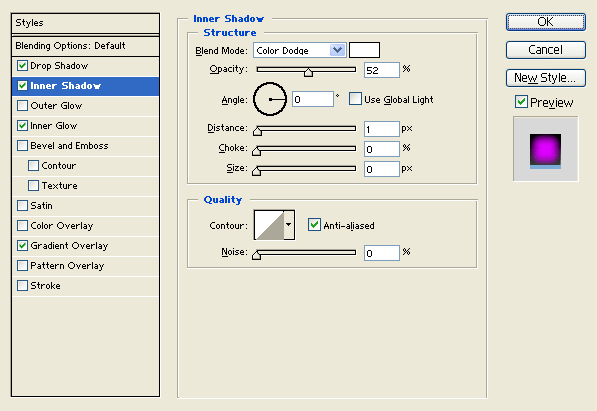
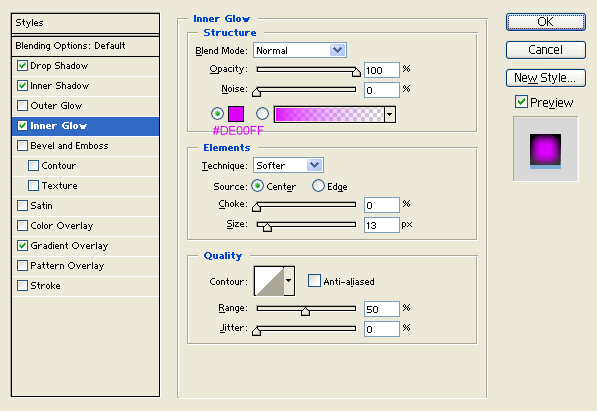
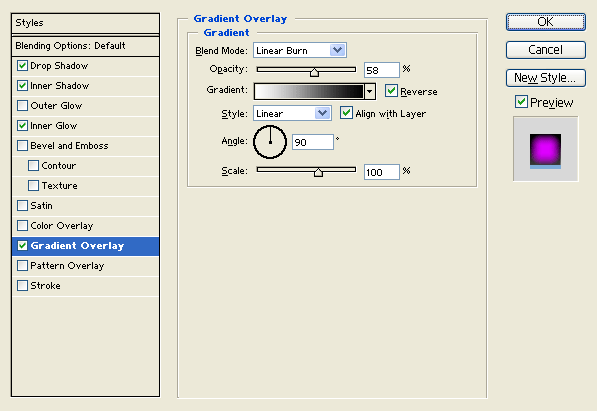
Result:

4. In a new text layer type your name with white color right on the first name. Then nudge it up by 3 pixels.

5. Under layer style (layer - layer style) add a drop shadow and inner shadow blending options to your white colored text layer. Then set the layer's blending mode to Darken at 68 % opacity level.

Result:

6. Duplicate your 'text design' layer set then go to (layer - merge layer set), the layer set should turn into a regular layer. Now place the second text design behind the 'text design' layer set on the layers window and nudge it down to create a 3D effect.

7. Under layer style (layer - layer style) add an inner shadow blending option to the second text design layer.
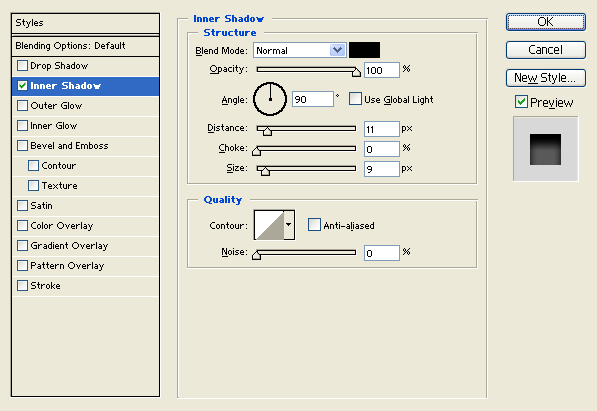
Result:

8. Now for the special smoke, first add a marquee selection around your name. Then go to (edit - copy merged) and paste.

9. Now go to (filter - distort - wave) and apply the settings below to your name design layer from step 7. If you don't like the result with the settings provided you can keep on applying the same filter until you get the same results.
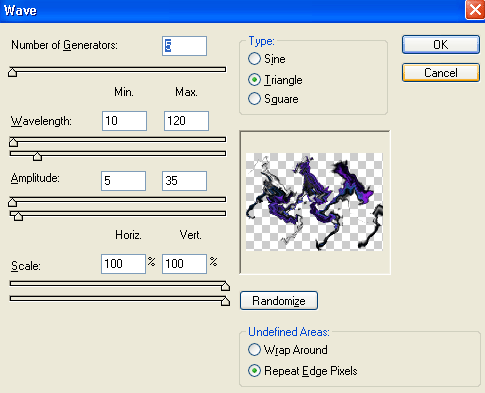
Result:
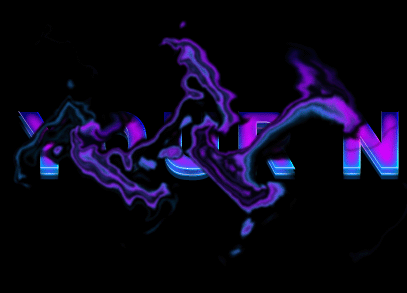
10. Once you have a smoke design that your satisfied with you can go ahead and scale it down so its the same size as your text. Then finish it off with more smoke design on the rest of your name.

And there you go, this was a long tutorial but it's finally finished! A new 3D Text effect with special smoke has been created, have fun with it!


Comments :
Post a Comment